


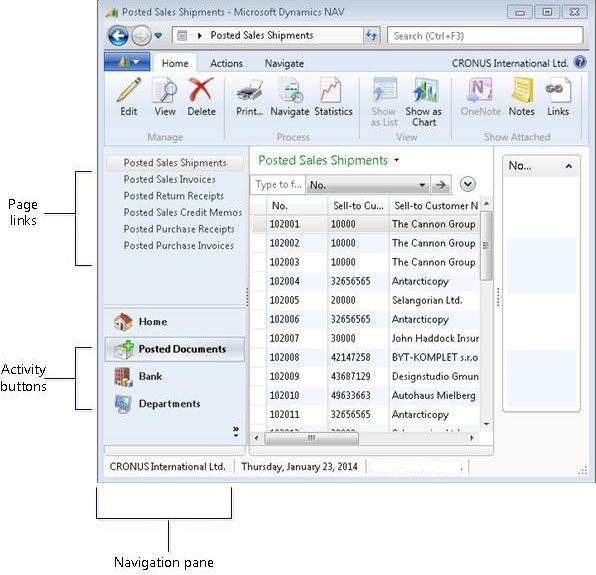
An activity button in the navigation pane displays a menu of links to additional pages in the RoleTailored client. The following illustration shows activity buttons in the navigation pane.
You create activity buttons and page links for the navigation pane by adding actions on the page that defines the Role Center. For more information, see Creating Activity Buttons for the Navigation Pane.
To create an activity button for the navigation pane
In the development environment, on the Tools menu, choose Object Designer.
In Object Designer, choose Page, select the Role Center page, and then choose Design to open Page Designer.
On the View menu, choose Page Actions.
In Action Designer, activity buttons are set up under an action control that has the Type set to ActionContainer and the SubType set to ActivityButtons. If this action control already exists, then go to the next step. Otherwise, do the following to add the activity button container:
-
Select a blank row.
To insert a row above another row, right-click the row, and then choose the New button. Note
Note The location of the activity button container with regard to other containers is not important. However, if you are inserting a row, then insert the container at the end of the actions that belong to the container above. -
In the row, set Type to ActionContainer and SubType to ActivityButtons.
-
Choose another row, and then go back on the row to fill in Name and Caption automatically.
-
Select a blank row.
To add an activity button, select a blank row after the ActivityButtons container row.
The order of the activity buttons in the Action Designer determines the default order in the navigation pane of the RoleTailored client. If there are existing activity buttons, then locate the new activity button where you want it now or you use the UP ARROW and DOWN ARROW keys to move it later.
Set Type to ActionGroup.
In the Caption field, type the text to display on the activity button in the RoleTailored client.
Note You can also include an image on the activity button. For more information, see How to: Set an Icon on an Activity Button Use the RIGHT ARROW and LEFT ARROW keys to indent the row one level from the ActivityButtons container row.
| Note |
|---|
| If the RoleTailored client is currently open, you will not see your changes until you close and restart. |
To add a page link to an activity button
In Action Designer, select the action that defines the activity button to which you want to add the page link.
On the View menu, choose Properties.
In the Properties window, set the RunObject property value to page <name> and substitute <name> with either the page name or ID. For example, to link to the page with the ID 142 and name Posted Sales Shipments, you can type page 142 or page Posted Sales Shipments.
Note Instead of typing page, you can just type p followed by the ID or name, such as p421 or Posted Sales Shipments. Use the RIGHT ARROW and LEFT ARROW keys to indent the row one level from the ActionGroup row.
| Note |
|---|
| If the RoleTailored client is currently open, you will not see your changes until you close and restart. |